
I made chicken biryani for dinner guests last fall and the silence that followed the first bite said everything.
Not bad silence. The kind where everyone pauses what they’re doing because something on their plate has their full attention.
Biryani has this reputation for being complicated and time-consuming. And honestly? It’s not fast. But it’s also not nearly as intimidating as people make it sound, and the payoff is absolutely worth every single minute.
So if you’ve been saving biryani for “someday,” today’s the day. 🍚
What Is Chicken Biryani, Exactly?
Biryani is a slow-cooked, layered rice dish that originated in the Mughal Empire and has since become one of the most beloved dishes across South Asia and the Middle East.
The word “biryani” is believed to come from the Persian word birian, meaning “fried before cooking.”
Here’s something most people don’t know: there are over 80 documented regional varieties of biryani. Hyderabadi, Lucknowi, Kolkata, Malabar, Sindhi — each one completely distinct in flavor, technique, and ingredients.
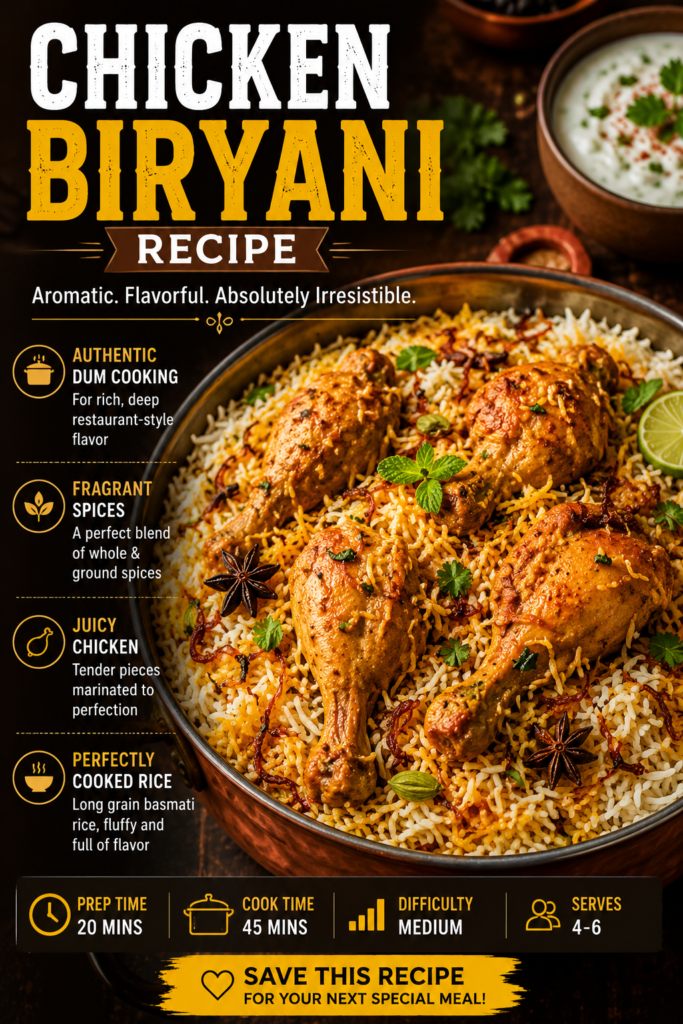
This recipe leans toward the Hyderabadi style, which is known for its bold spices, caramelized onions, and the dum cooking method (more on that below).
What You’ll Need
For the Chicken Marinade
- 1.5 lbs (700g) bone-in chicken pieces (thighs + drumsticks work great)
- 1 cup plain whole-milk yogurt
- 1 tablespoon ginger paste
- 1 tablespoon garlic paste
- 1 teaspoon turmeric powder
- 1.5 teaspoons red chili powder (adjust to your heat preference)
- 1.5 teaspoons garam masala
- 1 teaspoon coriander powder
- 1 teaspoon cumin powder
- Salt to taste
- Juice of half a lemon
- 2 tablespoons oil
For the Rice
- 2 cups basmati rice (aged basmati is best)
- 6 cups water
- 2 bay leaves
- 4 green cardamom pods
- 4 cloves
- 1 black cardamom pod
- 1-inch cinnamon stick
- 1 teaspoon cumin seeds
- Salt to taste
For the Layers + Cooking
- 3 large yellow onions, thinly sliced (for caramelizing)
- 3 tablespoons ghee
- 2 tablespoons neutral oil
- A big handful of fresh mint leaves
- A big handful of fresh cilantro, roughly chopped
- 3 tablespoons warm milk with a large pinch of saffron soaked in it
- Extra ghee for drizzling
Tools You’ll Need
- Large heavy-bottomed pot or Dutch oven (this is non-negotiable)
- A wide skillet or pan for frying the onions
- Tongs
- Aluminum foil
- Fine mesh strainer
- Mixing bowls
- Sharp knife + cutting board
Pro Tips
These are the things that genuinely make a difference when you’re making biryani for the first time:
- Marinate overnight if you can. A minimum of 2 hours works, but overnight is what takes the chicken flavor from good to exceptional.
- Your caramelized onions are the soul of this dish. Take your time with them. Low and slow is the move. If you rush and burn them, the whole pot will taste bitter. This step alone can take 25-30 minutes and it’s worth every second.
- Par-cook the rice to exactly 70%. This is probably the trickiest part for first-timers. The rice should still have a slight bite to it when you drain it — it finishes cooking during the dum process. Fully cooked rice at this stage = mushy biryani.
- Seal the pot tightly for dum cooking. Traditionally, dough is used to seal the lid. Wrapping the lid in a damp kitchen towel + covering with foil works just as well at home.
- Don’t skip the saffron milk. Even if saffron feels like an extra step, it’s what gives biryani its iconic golden streaks and that faintly floral aroma. A tiny pinch goes a long way.
Substitutions and Variations
No bone-in chicken? Boneless thighs work well but reduce the dum cooking time slightly. Avoid chicken breast — it dries out too easily.
Dairy-free? Swap the yogurt for coconut yogurt and use oil instead of ghee. The flavor profile will shift slightly but it still works.
Want it vegetarian? Paneer, mixed vegetables (potatoes, cauliflower, peas), or mushrooms all make great substitutions. Reduce cooking time since vegetables cook faster than chicken.
No saffron? A tiny pinch of turmeric mixed into the warm milk gives a similar golden color, though the flavor is different.
Spice adjustments: Cut the chili powder in half for a milder version. The garam masala stays — that’s the depth, not the heat.
Make Ahead Tips
The marinade can be done 24 hours ahead and refrigerated.
Caramelized onions can also be made a day in advance and stored in an airtight container in the fridge. This actually saves you the most time on the day you’re cooking.
The full biryani reheats beautifully the next day, arguably tasting even better after the flavors have had time to meld.
Nutritional Info (Per Serving, Approximate)
| Nutrient | Amount |
|---|---|
| Calories | ~520 kcal |
| Protein | 35g |
| Carbohydrates | 52g |
| Fat | 17g |
| Fiber | 3g |
Based on 4 servings. Numbers will vary based on exact ingredients used.
Meal Pairing Suggestions: Serve with cucumber raita, a simple kachumber salad (diced cucumber, tomato, red onion, lemon juice), or shorba (a light broth-based soup served before the biryani).
How to Make Chicken Biryani
Step 1: Marinate the Chicken
Combine the yogurt, ginger paste, garlic paste, turmeric, chili powder, garam masala, coriander powder, cumin powder, lemon juice, oil, and salt in a large bowl.
Add the chicken pieces and coat thoroughly.
Cover and refrigerate for at least 2 hours, or overnight.
Step 2: Caramelize the Onions
Heat the oil in a wide skillet over medium-low heat.
Add the sliced onions with a pinch of salt.
Cook low and slow, stirring occasionally, until they turn a deep golden-brown and slightly crispy. This takes 25-30 minutes. Don’t rush this step.
Remove half the onions and set aside for layering later. Leave the other half in the pan.
Step 3: Cook the Chicken
Add the marinated chicken directly to the pan with half the caramelized onions.
Cook over medium-high heat for 8-10 minutes, turning once, until the chicken is about 80% cooked through and the marinade has thickened into a gravy-like coating.
Remove from heat and set aside.
Step 4: Par-Cook the Rice
Wash the basmati rice thoroughly and soak for 30 minutes. Drain.
Bring 6 cups of salted water to a rolling boil. Add the whole spices (bay leaves, cardamom, cloves, cinnamon, cumin seeds).
Add the drained rice. Cook for exactly 6-7 minutes — the rice should be about 70% done, still firm in the center.
Drain immediately through a fine mesh strainer.
Step 5: Layer the Biryani
In your heavy-bottomed pot, drizzle a little ghee on the bottom.
Add the cooked chicken and its gravy as the first layer.
Spread half the par-cooked rice on top.
Scatter half the reserved caramelized onions, half the mint, and half the cilantro over the rice.
Drizzle half the saffron milk over this layer.
Add the remaining rice.
Top with the rest of the onions, mint, cilantro, and saffron milk.
Drizzle generously with ghee.
Step 6: Dum Cook
Cover the pot with a tight-fitting lid. Wrap the lid in a damp kitchen towel and press down, or seal the edges with foil.
Place the pot on a very low flame. Cook on dum for 25-30 minutes.
If your stove runs hot, place a flat griddle (tava) under the pot to diffuse the heat.
Step 7: Rest and Serve
Turn off the heat and let the pot rest, sealed, for 10 minutes.
When you open it, use a flat spatula or large spoon to gently scoop portions from the bottom up, mixing the layers slightly as you serve. You want bits of everything in each serving.
Leftovers and Storage
Biryani stores well in an airtight container in the fridge for up to 3 days.
To reheat: add a splash of water (2-3 tablespoons), cover, and warm on low heat on the stovetop. This keeps the rice from drying out.
Freezing: You can freeze biryani for up to a month. Thaw in the fridge overnight before reheating.
FAQ
Can I use store-bought ginger-garlic paste? Yes. Look for it in any Indian grocery store or the international aisle of larger supermarkets. It works just as well as homemade for everyday cooking.
What if I don’t have a heavy-bottomed pot? A regular pot with a tight lid can work, but watch the heat carefully. Heavy-bottomed pots distribute heat more evenly and prevent the bottom layer from burning.
My rice turned out mushy. What went wrong? Most likely the rice was overcooked during the par-cooking stage, or too much liquid remained before layering. Next time, watch the rice closely at the 6-minute mark and drain immediately once it’s 70% done.
Can I make this without ghee? You can use butter or neutral oil, but ghee gives biryani its signature richness and aroma. It’s worth getting a small jar if you can find it.
How do I know the dum cooking is working? You should see steam gently escaping from the sealed edges of the pot. If you’re sealing correctly, that’s exactly what’s happening inside.
Is it supposed to be this fragrant? Yes. 😄 If your kitchen smells incredible, you’re doing it right.
Wrapping Up
Chicken biryani isn’t just dinner. It’s the kind of meal that makes the table feel like a celebration even on a random Wednesday.
The first time you make it and pull off the lid to that cloud of saffron-scented steam, you’ll fully understand why people talk about biryani the way they do.
Give it a go this weekend. And when you do, drop a comment below — I want to hear how it turned out, what tweaks you made, and whether your family gave you the same silent, wide-eyed approval that says everything.
AI Image Generator Prompt
For your ingredient flat lay photo (9:16 format):
“Top-down flat lay photograph on white marble counters with subtle gold veining, natural soft window light, shot on iPhone 15 Pro. Arrange the following ingredients and tools together: 1.5 lbs bone-in chicken pieces (thighs and drumsticks), a bowl of plain whole-milk yogurt, small bowls of ginger paste and garlic paste, individual spice bowls containing turmeric powder, red chili powder, garam masala, coriander powder, cumin powder, a halved lemon, a bag of aged basmati rice, 3 large yellow onions (one sliced), bay leaves, green cardamom pods, cloves, black cardamom, a cinnamon stick, fresh mint sprigs, fresh cilantro, a small dish of saffron threads in warm milk, a block of ghee, a neutral oil bottle, and the following tools: a large Dutch oven or heavy-bottomed pot, a wide skillet, aluminum foil, a fine mesh strainer, and a set of tongs. Soft shadows, lifestyle food blogger aesthetic, ingredients slightly overlapping with organic spacing, hints of gold accents in the marble background. 9:16 vertical portrait format.”
Did this recipe work for you? Leave a comment and let me know!